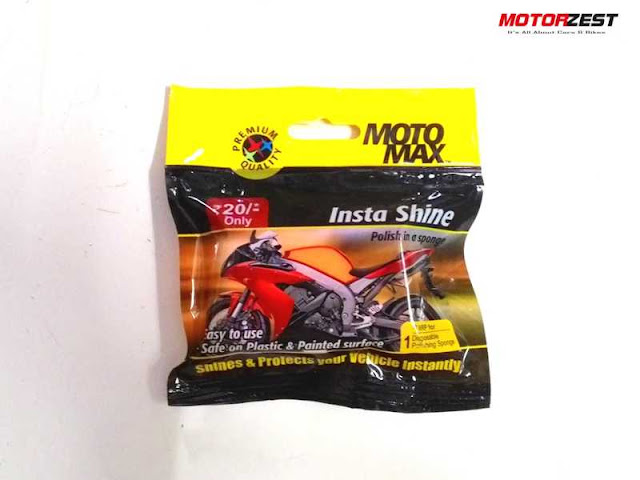
MotoMax Insta Shine Polish Sponge Review
The older your bike gets, the more difficult it becomes to keep the painted surface shining. The ultra-glossy coats on the painted surface of your newly purchased bike does not last forever. Once you lose the factory coated shine, it is a tedious task to put the shine back on your old horse. The traditional methods of buffing the painted surface with rubbing compound, then applying wax polish and again buffing the polish to get the ultimate shine consumes hours and hours. And if you do not have a buffing machine, it takes ages and tremendous amount of manual labor to get that ultimate shine.
The easier way to get shine back onto your bike, is to give it to your local garage or some bike detailing expert outlet, both of which would cost you decent amount of money. The sad fact remains that no matter how expensive polish treatment you give to your bike, the shine fades away in a matter of months or in some cases in a matter of weeks.
Keeping your bike shiny & polished through the year is taxing to the body (if you are doing it yourself) or expensive (if you are outsourcing the task of polishing to the local garages)
And this is the reason why Motomax - a brand of car/bike self care products, owned by Pidilite Industries (the makers of Fevicol) - has introduced the Motomax Insta Shine ranges of products to address the above two problems.
The Insta Shine range includes two products - the Insta Shine Polish Sponge & the Shiner Spray Polish. In this article, we review the Insta Shine Polish Sponge which you can buy at just Rs 20/-
The Insta Shine Polish Sponge - referred to as 'sponge' from now on - is a unique product wherein the sponge in impregnated with a special grade of Polish. In simple language, the polish is mixed inside the sponge while manufacturing. The sponge measures approx 3-inch, 2-inch and 1-inch in length, breadth and width approximately.
We tested this sponge on a 5-year old red Pulsar 220S whose colour had started to fade away. We used the sponge on the left half of the Pulsar and kept the right half untouched. The results were amazing as you can see the difference in the photos.
The best thing about the sponge is the ease with you can polish your own bike. The application is quick and the results are good enough. You need not purchase anything else to use this sponge. There is no need to buy any wax/liquid polish. Just clean the painted surface with water, cut open the Insta Shine Polish Sponge and apply it to the painted surface (be it plastic/fibre/metal). And Wallah! you get instant shine on your bike. The whole exercise would just take 30 mins. There is no need to buff the area at all.
 |
| Left Image : Unpolished side. Right Image : Polished side. |
 |
| Left Image : Unpolished side. Right Image : Polished side. |
The Motomax Insta Shine Sponge saves time, money and tremendous effort and gives you the same quality of shine as you would have got with your regular wax polish. The only problem you could face while using the sponge is that the embedded polish might stick to your bare hands if you are not using a glove. And that could be a mess because the polish would stick to your hands and be all over the places you touch. Another point to note - the sponge has more than enough polish inside to cover all the painted surface of your bike. So, that's Rs. 20/- for a full bike shine. We doubt if you can use the sponge again for a second round of polish.
But the question is how long will the shine last? We don't have any answer for this right now. Since we have just applied the polish to our Pulsar 220S, we shall wait a few days to comment on this. This space will be updated on 31st August 2015 - ten days after we applied the polish. Let us see on 31st August, whether the Insta Shine Sponge treatment would even last 10 days.
How to use the Motomax Insta Shine Sponge?
1. Clean the painted surface of your bike with water and a clean dry cloth. (You can wash your bike too if you have the time with a good shampoo. Best thing to do is to give your bike for a diesel wash at your local garage.)
2. Make sure that all the painted surfaces are dry after washing. (Use a lint-free cloth)
3. Cut open the packet and apply the sponge directly over the painted surface with a slight pressure in a circular motion.
4. Wait for 2 minutes for the polish to dry and then clean the excess polish off the surface with a clean dry cloth. (It is advisable to take one part of the painted surface at a time.)
5. Wallah! You are done!
Caution : Do not apply the polish on the clutch/brake levers, gear-shift rod, tyres, grab handles and steering handle grips. Since the polish can make these parts slippery and make cause you to lose control of your bike.


Post a Comment